Client/Server Logins
Waaay back when we learned about repl.db, we mentioned the idea of a client/server model for storing data in one place and dishing it out to multiple users. This model is the way we overcome the issue with repl.db of each user getting their own copy of the database.
Well, now we can use Flask as a webserver. We can build this client server model to persistently store data in the repl (the server) and have it be accessed by multiple users who access the website via the URL (the clients).
Get Started
Previously, we have built login systems using Flask & HTML. We're going to start with one of those systems and adapt it to use a dictionary instead.
👉 First, let's remind ourselves of the way the system works. Here's the Flask code. Read the comments for explanations of what it does:
from flask import Flask, request, redirect
# imports request and redirect as well as flask
app = Flask(__name__, static_url_path='/static')
# path to the static file that stores my images
users = {}
users["david"] = {"password" : "Baldy1"}
users["katie"] = {"password" : "k8t"}
# A dictionary hard coded into the program that stores the login details for two users
@app.route('/login', methods=["POST"])
def login():
form = request.form
try:
if users[request.form["username"]]["password"]== request.form["password"]:
return redirect("/yup")
else:
return redirect("/nope")
except:
return redirect("/nope")
# Login checking code - uses POST because it's dealing with usernames & passwords so we want encryption
# If the user details are correct, they get a lovely success gif, if not, they get a 'nope' gif.
# Try except used to load the 'nope' in case there's an error.
@app.route("/nope")
def nope():
return """<img src="static/nerdy.gif" height="100">"""
@app.route("/yup")
def yup():
return """<img src="static/yup.gif" height="100">"""
# The two methods above load the relevant gif depending on the result of the '/login' method
@app.route('/')
def index():
page = ""
f = open("login.html", "r")
page = f.read()
f.close()
return page
# Loads the login HTML page that I've built separately on run.
app.run(host='0.0.0.0', port=81)
Static Folder
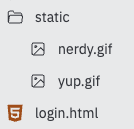
👉 I've also created a 'static' folder with my gifs, and I've written a basic login HTML page in a separate file called login.html.
👉 Here's the code for that HTML login form:
<form method="post" action="/login">
<p>Username: <input type="text" name="username" required></p>
<p>Password: <input type="password" name="password" required></p>
<button type="submit">Log in</button>
</form>
Store and Use Data
👉 To replace the dictionary with a database, first I need to import repl.db.
from flask import Flask, request, redirect
from replit import db
Storing The Data
👉 Next, I'm going to delete the line that defines the dictionary and change the assignment of the next two lines to store the data in the database instead.
db["david"] = {"password" : "Baldy1"}
db["katie"] = {"password" : "k8t"}
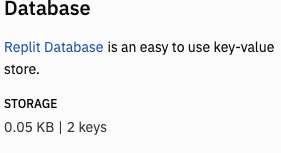
👉 Now run the program to add the data to the dictionary. I can tell that it's worked because the database pane now shows 2 keys:
👉 Then comment out these lines - you don't want to add the data more than once.
#db["david"] = {"password" : "Baldy1"}
#db["katie"] = {"password" : "k8t"}
Using The Data
👉 Now I'm going to change my login subroutine to reference the database instead of the users{} dictionary.
@app.route('/login', methods=["POST"])
def login():
form = request.form
try:
if db[request.form["username"]] ["password"]== request.form["password"]:
return redirect("/yup")
else:
return redirect("/nope")
except:
return redirect("/nope")
Change Data
Now that we have a dictionary we can give users the option to edit their data. I'm going to make it so that the change password option is given on the successful login screen.
👉 First, I need a quick change.html page to create the form:
<form method="post" action="/changePass">
<p>Username: <input type="text" name="username" required></p>
<p>New Password: <input type="password" name="newPassword"></p>
<button type="submit">Change</button>
</form>
👉 Next, I'm going to add the form to my successful login screen. That's the yup subroutine. To do this I have:
Assigned the gif to a page variable instead of returning it.
Borrowed the file open & read code from my index subroutine and adapted it to open & read the change.html file.
Used += in the page += f.read() line to add the contents of the change.html file to the successful login page.
@app.route("/yup")
def yup():
page = """<img src="static/yup.gif" height="100">"""
f = open("change.html", "r")
page += f.read()
f.close()
return page
Now when I login, I get the change password form underneath my successful login gif.
👉 However, this won't do anything without an app.route, so let's write that next.
App Route
This code will update the database with any new password set. It will also display the updated password on the screen for testing only. I don't need to tell you not to do this IRL right?
@app.route("/changePass", methods=["POST"])
def change():
form = request.form
db[request.form["username"]] ["password"]= request.form["newPassword"]
return f"""Password changed to {request.form['newPassword']}"""
Changing a password now should get you a message like this:


Comments
Post a Comment